Adding a note to your cart and modifying email templates
Adding a special instruction field to your cart page
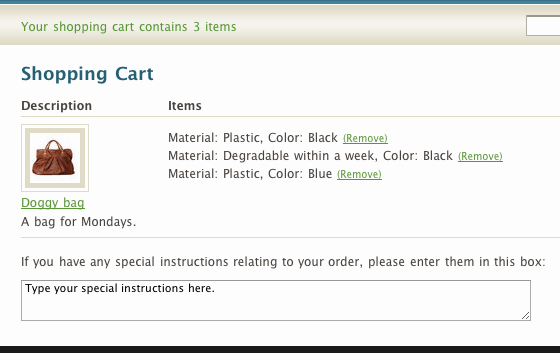
Users who browse without JavaScript have been instructed to specify their chosen options in a special instruction text box on the cart page. Now, we will add this special instruction box. Open your cart.liquid template, and add the following XHTML/Liquid markup to it, between the table element and the div with id basket-right:
<div id ="basket-left">
  <div class="form-item">
    <p>
      <label for="note">If you have any special instructions relating to your order,
      please enter them in this box:</label>
    </p>
    <p>
      <textarea name="note" id="note" rows="3" cols="70" value="{{ cart.note }}"></textarea>
    </p>
  </div>
</div>

You may want to style your new added div element with CSS like so:
#basket-left {
  float: left;
}
Modifying the emails that are sent to you about the order
You can add the cart.attributes information to your New Order notifications, by modifying your New Order Notification template. In your Admin area, go to Preferences | Email and Notifications, and click on the New Order Notification link.
Edit the template by simply adding this code outside of the for loop:
{{ attributes }}
{{ note }}
You can edit other email templates in the same way.
If you've used this tutorial for your shop, consider dropping me a thank you line here, and/or donate to my website. I don't work for Shopify. No one is paying me to write these tutorials. I am doing this to help the Shopify community. Ironically, I am doing myself a disservice, because if I show you how to do these things, and do this well enough, then you won't need to hire me do do these things for you ;-) Thanks.