Working on the product pages
There shouldn't be a radio button next to that single variant
The Vogue theme (the one I am basing this tutorial on) is good to go for several variants. It presents a list of options on the product page, to buy either variant 1 or variant 2 etc. of a product. The problem with that XHTML is that you are still presented with a radio button when only one variant of the product is available for purchase, as is the case here. If there is no option for you to choose from, there ought to be no radio button to tick. We will clean that up.
Open your product.liquid template and edit the form element like so:
<form action="/cart/add" method="post">
  <div id="product-variants">{% assign variant = product.variants.first %}
    <p class="odd">
      <input type="hidden" name="id" value="{{ variant.id }}" id="hidden_{{ variant.id }}" />
      <label for="hidden_{{ variant.id }}">
        <span class="bold-blue">{{ variant.price | money }}</span>
        {% if variant.price < variant.compare_at_price %}
        <del>{{ variant.compare_at_price | money }}</del>
        {% endif %}
      </label>
    </p>
  </div>
  <input type="image" src="{{ 'purchase.png' | asset_url }}" name="add" value="Purchase" id="purchase" />
</form>
Basically, what we've set up to do here is to examine only the first variant of our product and assign that variant to a variable called variant.
{% assign variant = product.variants.first %}Then we changed the type of the input element from radio to hidden. That way, the variant id still gets submitted with the form — and hence the variant is added to the cart — but no radio button is shown anymore.
<input type="hidden" name="id" value="{{ variant.id }}" id="hidden_{{ variant.id }}" />Furthermore, we got rid of the check on the availability of our variant. The thing is, if the product is available in only one variant (as it is here), and that variant is out of stock, Shopify is smart enough to set the value of product.available to false, hence the form is not even output to screen (refer yourself to your product.template to convince you of this.)
Why use a list element if there's only one item in it? No reason, so we got rid of that too. However, we had to modify our CSS a tiny bit to make the whole thing still look pretty:
#product-variants {
  width: 13em;
  font-size: 125%;
}

#product-variants p.odd {
  padding: 4px 6px;
}
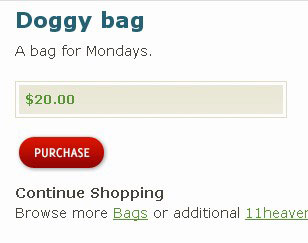
Our hidden field label is displayed, so what we end up with now is no radio button next to the set price. Super.

Adding our SELECT elements to the product template
Time to add these drop-down select widgets to account for our product attributes. We'll write the markup for two select elements, one for the material attribute and another for the color attribute. Time to brush up on your XHTML skills.
<select name="material">
  <option value="Degradable within a week" selected="selected">Degradable within a week</option>
  <option value="Plastic">Plastic</option>
  <option value="Faux leather">Faux leather</option>
</select>
<select name="color">
  <option value="Blue" selected="selected">Blue</option>
  <option value="Black">Black</option>
  <option value="Yellow">Yellow</option>
  <option value="Shit brown">Shit brown</option>
</select>
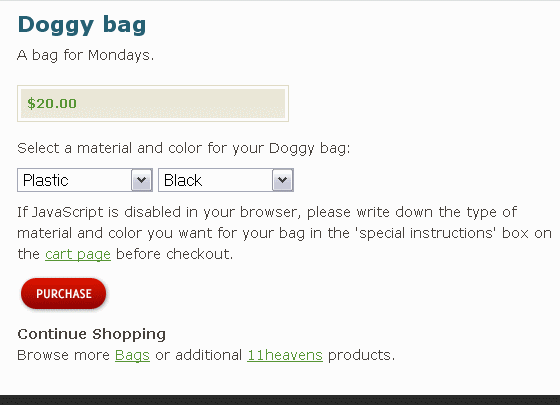
To provide this:
About the value and selected attributes
For the value attribute of each option, use human-readable text. Do not use text that is handleized, or camelCased — or what not. You will display theses values in the cart later on.
Move the selected="selected" attribute to whichever option element makes more sense as a default. If plastic black bags are your most popular, then rewrite your SELECT elements like so:
<select name="material">
  <option value="Degradable within a week">Degradable within a week</option>
  <option value="Plastic" selected="selected">Plastic</option>
  <option value="Faux leather">Faux leather</option>
</select>
<select name="color">
  <option value="Blue">Blue</option>
  <option value="Black" selected="selected">Black</option>
  <option value="Yellow">Yellow</option>
  <option value="Shit brown">Shit brown</option>
</select>
To provide this:
This markup can be placed within the form element or not. What I mean here is that this XHTML can be copied and pasted between the opening and closing tags of the form element, or pasted outside of it. The selected options will NOT get submitted with the form. The selected options will be stored in a cookie upon form submission, and that is different.
Let's place the select elements inside the form, and add text above and below these elements — to explain to the visitor what to do about them.
<form action="/cart/add" method="post">
  <div id="product-variants">{% assign variant = product.variants.first %}
    <p class="odd">
      <input type="hidden" name="id" value="{{ variant.id }}" id="hidden_{{ variant.id }}" />
      <label for="hidden_{{ variant.id }}">
        <span class="bold-blue">{{ variant.price | money }}</span>
        {% if variant.price < variant.compare_at_price %}
        <del>{{ variant.compare_at_price | money }}</del>
        {% endif %}
       </label>
     </p>
   </div>
   <p>Select a material and color for your {{ product.title }}:</p>
   <select name="material">
     <option value="Degradable within a week">Degradable within a week</option>
     <option value="Plastic" selected="selected">Plastic</option>
     <option value="Faux leather">Faux leather</option>
   </select>
   <select name="color">
     <option value="Blue">Blue</option>
     <option value="Black" selected="selected">Black</option>
     <option value="Yellow">Yellow</option>
     <option value="Shit brown">Shit brown</option>
   </select>
   <p class="no-javascript">If JavaScript is disabled in your browser,
     please write down the type of material and color you want for your bag
     in the 'special instructions' box on the
     {{ 'cart page' | link_to: '/cart' }} before checkout.</p>
  <input type="image" src="{{ 'purchase.png' | asset_url }}" name="add" value="Purchase" id="purchase" />
</form>
Note that we'll hide that special note added at the bottom using JavaScript so that visitors who do have JavaScript enabled in their browser won't see it. The special instructions text box on the cart page will provide an alternative for those who browse without JavaScript, an alternative to inform us, the shop owner, about the material and color they want for their bags.
We will style our select elements up a little bit, simply because we do not like things that look untidy (I am a total clean freak). Let's add space below and make both elements equally large. Since that purchase button is by default inline, it will tend to crop up next to our select elements so let's make it behave like a block element.
select {
  margin-bottom: 10px;
  width: 15em;
}
#purchase {
  display: block;
}
Hiding some text from people who browse with JavaScript
We will write some JavaScript to hide the text added just previously from people who do browse with JavaScript. These people don't need to be told to add special instructions to their cart. We will use a hook to access that special paragraph and then simply hide it using the jQuery method hide(). We have to hide that paragraph when the document is 'ready' so we have to wrap our code as shown below. Open your theme.liquid template and add this:
{{ 'jquery-1.2.6.min.js' | asset_url | script_tag }}
<script type="text/javascript">
  jQuery.noConflict();
  jQuery(function() {
  /* some code here to execute when the document is ready */
  });
</script>
The jQuery we need to use is quite simple and of the form jQuery('.className').hide(). We will select our paragraph based on its class name.
{{ 'jquery-1.2.6.min.js' | asset_url | script_tag }}
<script type="text/javascript">
  jQuery.noConflict();
  jQuery(function() {
    jQuery('.no-javascript').hide();
  });
</script>
To test this, disable JavaScript in your browser (I use the Web Developer Toolbar for this), refresh the web page and see the special instruction for visitors who browse without JavaScript.

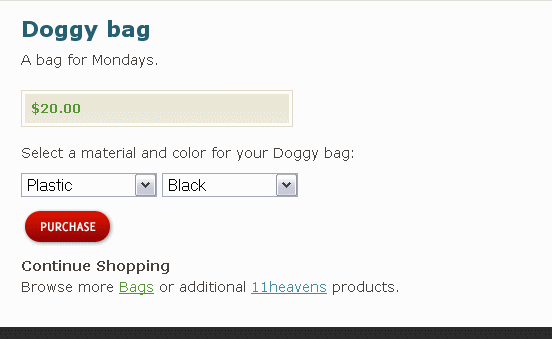
Re-enable JavaScript, refresh, and see the special instruction disappear:

Storing attributes in a cookie using JavaScript
I said I'd share an algorithm with you. I will now provide it in a nutshell. We will store our attributes in a cookie when the visitor clicks on the Purchase button. Once our visitor lands on the cart page, we will read from our home-baked cookie and do two things:
- Display the options chosen next to the cart item, as a 'here is what you had picked earlier on' reminder, and
- Submit the options chosen with the checkout form using properly named form fields — named so that Shopify will pick up the information and display it in the transaction slip.
This poses 2 difficulties:
- We want to write to our web cookie the attribute options chosen possibly for quite a few items, as the cart may contain several items.
- A web cookie can only store text, while what we're trying to keep track of is a relatively complex data structure.
CART ITEM 1 (Doggy Bag)
+ material: faux-leather,
+ color: shit-brown
CART ITEM 2: (Awful Bag)
+ material: plastic,
+ color: black
In this tutorial, we will use JSON to keep track of our cart items' attributes. JSON is just text, so JSON can be stored in a web cookie. We're lucky because JavaScript provides tools to translate any complex data structure to JSON, and to translate that JSON back to the original data structure.
To translate to JSON and back, we will use a jQuery plugin. Download the minified version of the plugin and upload this file to your Assets directory — the same way you added the jQuery library previously. Then, link to it in your theme.liquid file:
{{ 'jquery-1.2.6.min.js' | asset_url | script_tag }}
{{ 'jquery.json.min.js' | asset_url | script_tag }}
<script type="text/javascript">
  jQuery.noConflict();
  jQuery(function() {
    jQuery('.no-javascript').hide();
  });
</script>
Although using web cookies is no rocket science, it can still be a little quirky, so we'll use a jQuery plugin to read and write to our web cookie. Download the cookie plugin, upload it to your Assets directory, and link to it.
{{ 'jquery-1.2.6.min.js' | asset_url | script_tag }}
{{ 'jquery.json.min.js' | asset_url | script_tag }}
{{ 'jquery.cookie.js' | asset_url | script_tag }}
<script type="text/javascript">
  jQuery.noConflict();
  jQuery(function() {
    jQuery('.no-javascript').hide();
  });
</script>
Why are we using so many plugins here? Out of the box, due to its light-weight nature, jQuery provides remarkable tools for selecting DOM elements, event-handling, DOM scripting and AJAX. And that's about it.
Let's try something simple, as an exercise. Upon submission of the Add to Cart form, let's pop up an alert message telling us how much items are in the cart. We will use the following jQuery code to achieve this:
/* When user clicks on any element with id set to 'purchase'... */
jQuery('#purchase').click(function() {
  alert({{ cart.item_count }});
});
We are here listening to a click event associated to all elements with an id attribute set to 'purchase'. As it turns out, our purchase button has such id. We're telling the browser to pop up an alert message when such event occurs.
So we will amend our theme.liquid head element like so:
{{ 'jquery-1.2.6.min.js' | asset_url | script_tag }}
{{ 'jquery.json.min.js' | asset_url | script_tag }}
{{ 'jquery.cookie.js' | asset_url | script_tag }}
<script type="text/javascript">
  jQuery.noConflict();
  jQuery(function() {
    jQuery('.no-javascript').hide();
    jQuery('#purchase').click(function() {
      alert({{ cart.item_count }});
    });
  });
</script>
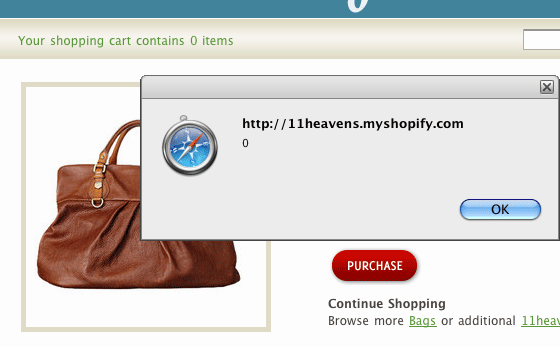
To see the alert box, click on the Purchase button.

Let's play with cookies now.
Let's begin by baptizing our cookie. We'll name it shopify_cart_attributes. Avoid space and capital letters here. The way we'll play with our web cookie will be as trivial as this:
So we will amend our theme.liquid head element like so:
{{ 'jquery-1.2.6.min.js' | asset_url | script_tag }}
{{ 'jquery.json.min.js' | asset_url | script_tag }}
{{ 'jquery.cookie.js' | asset_url | script_tag }}
<script type="text/javascript">
  jQuery.noConflict();
  jQuery(function() {
    jQuery('.no-javascript').hide();
    jQuery('#purchase').click(function() {
      var myValue = 'Hello beautiful!';
      var configuration = {expires: 14, path: '/', domain: '{{ shop.domain }}'};
      jQuery.cookie('shopify_cart_attributes', myValue, configuration);
      alert(jQuery.cookie('shopify_cart_attributes'));
    });
  });
</script>
Something important to understand at this point. When a visitor adds a new product to his shopping cart, chances are his cart is not empty. If the cart already contains stuff, then it means the cookie is already set, exists. We must not overwrite its value without first storing its current value. If we simply overwrite it, it would be disastrous, we would lose the attributes set for all the other cart items. Instead, we must only add information to our cookie. The way we go about this is to first check if the cookie exists. If it doesn't exist, then the value returned by reading the cookie will be null. If the cookie does exist, we will store its JSON value to a variable, translate this variable, modify the result, and then translate the whole thing back to JSON and store it to the cookie again, effectively overwriting it, but this time with an up to date value.
Using jQuery, we will listen to the submit event on the Add to Cart form. To get a hold of the form element that submits an item to the cart, we will open our product.liquid template and add an id attribute to the form. Like so:
<form action="/cart/add" method="post" id="add-to-cart">Then, we will open theme.liquid again.
Read the comments. They are in green. There are more comments than there is code.
jQuery.noConflict();
jQuery(function() {
  jQuery('.no-javascript').hide();
  // console.log('Value of the cookie is %s', jQuery.cookie('shopify_cart_attributes'));
  // Listening to the submit event on the form with id 'add-to-cart'
  jQuery('#add-to-cart').submit(function() {
    // Prepare an Array to store the attributes for each cart item.
    var items = [];
    // Reading the cookie.
    var myJSON = jQuery.cookie('shopify_cart_attributes');
    // If the cookie does exist.
    if (myJSON != null) {
      // Parse the cookie.
      items = jQuery.evalJSON(myJSON);
    }
    // Creating an attribute object.
    var attribute = {};
    // Assigning values to its properties.
    // The material chosen, the color, the variant ID and some unique ID.
    // The variant ID and the unique ID is to help us keep track of what is what.
    attribute.material = jQuery('select[name=material]').val();
    attribute.color = jQuery('select[name=color]').val();
    attribute.variant_id = '{{ product.variants.first.id }}';
    attribute.unique_id = '{{ 'now' | date: '%H%M%S' }}';
    // Adding the attribute object to the items array.
    items.push(attribute);
    // Writing to the cookie.
    var configuration = {expires: 14, path: '/', domain: '{{ shop.domain }}'};
    jQuery.cookie('shopify_cart_attributes', jQuery.toJSON(items), configuration);
    // console.log('Value of the cookie is %s', jQuery.cookie('shopify_cart_attributes'));
    // Submitting the form to add the item to the cart.
    return true;
  });
});
The Liquid Tag {{ shop.domain }} provides you with the domain name of your shop. The web cookie that we're creating and using here is a path cookie. It has the form Set-Cookie: name=value; expires=date; path=/; domain=.example.org. The cart cookie Shopify creates from its back-end is also a path cookie.
Why the unique ID
Several cart items with differing attributes can share the same variant ID. Although it will certainly be useful to keep a record of the variant ID of the item added to the cart, it will also be useful to tag each cart item in our cookie with a unique identifier, called unique_id. We could use the Liquid Tag {{ cart.item_count }} to compute such unique ID, as this Tag is incremented automatically when an item is added to the cart. However, if the user later edits his cart on the cart page, and leaves the cart page to add yet another item, he may end up with 2 cart items sharing the same ID. There are 2 ways to generate a unique ID in computer programs: use a global variable that is incremented and never reset, or use a timestamp. I have decided to use a timestamp, and I use Liquid to generate it:
// @see http://wiki.shopify.com/FilterReference#date
attribute.unique_id = "{{ 'now' | date: "%H%M%S" }}";
Uncomment the console.log instructions in your JavaScript code and view your site in Firefox. Using the Firebug console, you will be able to read the cookie value before and after you click on the Purchase button. You can use the Web Developer Toolbar add-on to delete all your path cookies. This will effectively delete Shopify's cart cookie and our own cookie.
If I add a blue plastic bag and a faux leather yellow bag to my cart, the shopify_cart_attributes cookie as shown in Firebug will become:
[{"material": "Plastic", "color": "Blue", "variant_id": "7057372", "unique_id": "033206"}, {"material": "Faux leather", "color": "Yellow", "variant_id": "7057372", "unique_id": "033239"}]
We will soon turn our attention to the cart page, but first we will clean things up a little bit.
Where to put JavaScript and graceful degradation
You may have heard of unobtrusive JavaScript and graceful degradation and the ideal of placing all JavaScript code in the head element of the document, or even better in a separate file. You may also have heard of namespacing functions and variables — avoiding defining functions and variables in the global-scope, in other words. The Vogue theme is an example of having done everything the wrong way, when it comes to JavaScript best practices, you could say, yet it works. In our own code, we will try and live up to a few standards.
Unobtrusive JavaScript means that we should separate behavior from markup, hence avoid adding event handlers in the code. This HTML/Liquid from Vogue's cart.liquid is bad, because an onclick attribute is used to execute JavaScript right in the HTML.
<td class="basket-column"><a href="#" onclick="remove_item({{ item.variant.id }}); return false;">Remove</a></td>A function is also declared in the midst of the cart.liquid page, outside of the head element, the function remove_item(), and it is declared without a namespace, so it is a global scope function. Bad.
We will not correct the Vogue's implementation of JavaScript, that certainly ain't our goal. However, we will try and make the JavaScript we write — our own JavaScript — more classy.
We are not just being anal. The ideal of behavior and markup separation is handy. You can place all your code in one place — and not look for it all the time (to make modifications to it). And the separation helps with graceful degradation. Speaking of which, if JavaScript is disabled for the visitor, we're still showing him the select boxes for attributes, and we're presenting him with a message asking him to type his chosen attributes in a text box on the cart page. So you could say that we are trying to make the shop still usable without JavaScript. People that browse without JavaScript can still buy a blue plastic bag, provided that they know that a blue plastic bag is available — and they will — and they can inform us, the buyer, of their preferences, on the cart page, if they are clearly instructed to do so, and they are.
All JavaScript code we wrote so far has been placed in the head element of theme.liquid.
The template theme.liquid is our XHMTL document placeholder. However, the code we wrote was only needed on product pages. Although it is far from necessary, we could wrap our JavaScript code in a Liquid If Tag, like so:
// console.log('Value of the cookie is %s', jQuery.cookie('shopify_cart_attributes'));
{% if template == 'product' %}
// If we are on a product page.
jQuery(function() {
  jQuery('.no-javascript').hide();
  // Listening to the submit event on the Add to Cart form.
  jQuery('#add-to-cart').submit(function() {
    // Prepare an Array to store the attributes for each cart item.
    var items = [];
    // Reading the cookie.
    var myJSON = jQuery.cookie('shopify_cart_attributes');
    // If the cookie does exist.
    if (myJSON != null) {
      // Parse the cookie.
      items = jQuery.evalJSON(myJSON);
    }
    // Creating an attribute object.
    var attribute = {};
    // Assigning values to its properties.
    // The material chosen, the color, and the variant ID.
    // The variant ID and the unique ID is to help us keep track of what is what.
    attribute.material = jQuery('select[name=material]').val();
    attribute.color = jQuery('select[name=color]').val();
    attribute.variant_id = '{{ product.variants.first.id }}';
    attribute.unique_id = '{{ 'now' | date: '%H%M%S' }}';
    // Adding the attribute object to the items array.
    items.push(attribute);
    // Writing to the cookie.
    var configuration = {expires: 14, path: '/', domain: '{{ shop.domain }}'};
    jQuery.cookie('shopify_cart_attributes', jQuery.toJSON(items), configuration);
    // console.log('Value of the cookie is %s', jQuery.cookie('shopify_cart_attributes'));
    // Submitting the form to add the item to cart.
    return true;
  });
});
{% endif %}
All I did here was put the JavaScript code between Liquid tags:
{% if template == 'product' %}
/* JavaScript code we need only on product pages. */
{% endif %}
Do this, then do a View Source on any page that is not a product page, you will not see the JavaScript code we wrote (minus the commented console.log instruction), our code will not have been output to the browser. Then go to a product page, and there it is, voilà. Using these Liquid Tags makes the source prettier, cleaner, there is less JavaScript to parse for the browser. This is also to prepare you... for when JavaScript MUST be executed ONLY on certain pages, in certain conditions that Liquid can inform us about.